If you’ve ever worked on construction projects that involve curved structures—think soaring archways, domed ceilings, winding facade panels, or even the curved retaining walls of commercial parking garages—you know how tricky it can be to get every detail right. As someone who’s spent the last 12 years as a Brick Mesh supplier, I’ve lost count of how many project teams come to me halfway through a job, realizing their standard flat brick mesh isn’t going to cut it on a curve. “Isn’t mesh just mesh?” they ask. Let me pull back the curtain on why curved structures have non-negotiable special installation requirements for brick mesh, and what I’ve learned from walking hundreds of teams through successful installs over the years. Brick Mesh
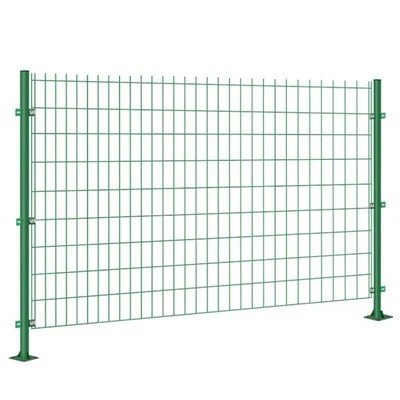
First, let’s start with the basics: what brick mesh does, and why curves change everything. Standard brick mesh is a flexible, galvanized steel or stainless steel grid that’s installed between brick wythes (layers) to distribute load, prevent brick cracking from structural movement, and resist moisture penetration. For flat walls, a standard 3-foot by 5-foot sheet with 2-inch by 2-inch openings works perfectly—you unroll it, staple or tie it to the sheathing, and start laying bricks. But curves? A curved structure creates dynamic, uneven stresses that flat mesh was never designed to handle. I once had a general contractor call me in a panic on a downtown residential project in Chicago. They’d installed standard flat brick mesh for their curved facade, and within three weeks, half the mesh had pulled away from the sheathing. The curve had forced the flat mesh to bend at sharp, unnatural angles in some spots, and in others, it couldn’t conform tightly enough to the curve, leaving gaps. When brick layers started laying bricks, the unsupported mesh shifted, leading to cracked bricks and uneven gaps between units. That project ended up costing twice as much to fix as it would have if they’d used the right mesh for a curved structure.
So what are the actual special installation requirements I always walk new teams through? Let’s break them down one by one, with real examples from jobs I’ve managed or supplied mesh for.
First, mesh flexibility and conformability. This is non-negotiable for any curve with a radius of 10 feet or less—architectural and structural standards don’t usually specify a radius cutoff, but in my years of experience, a curve tight enough that you can wrap your arms around it requires mesh that can bend without kinking. Standard rigid mesh has a tensile strength of around 50,000 PSI, but it only bends along one axis. Curved structures, especially double-curved (like domes) or compound curves (like the front of a modern museum entrance), require mesh that bends along two axes. That’s why we developed a custom high-tensile, low-profile steel mesh a few years ago—its wires are spaced at 1.5-inch intervals instead of the standard 2-inch, and each wire is pre-tensioned during manufacturing to let it bend smoothly along both X and Y axes without developing sharp creases. On a recent job for a coastal resort in Florida, the architect specified a sweeping facade curve with a 7-foot radius. The GC tried to use standard mesh first, and they couldn’t get it to lay flat against the curved sheathing without leaving ½-inch gaps in some sections. When they switched to our custom curved mesh, the install time dropped by 30%, and the brick layers reported no issues with the mesh shifting mid-lay. The key here is: don’t assume flexibility is just “bendable.” For curves, it needs to be axis-flexible and pre-engineered to avoid kinking, which would create stress points that lead to cracked bricks over time.
Second, fastener spacing and type. Flat wall installation uses standard 1.5-inch galvanized staples every 12 inches along the mesh edges, and every 18 inches in the field. But curves change that completely. When mesh is curved, it creates a tensile load—think of stretching a rubber band around a can; the mesh wants to spring back to its flat shape. If you use standard fastener spacing, that spring-back pulls the mesh away from the sheathing, leading to the gaps I saw in Chicago and Florida. For curved structures, I require my team and my clients to adjust fastener spacing to every 8 inches along the curve’s outer edge, and every 10 inches in the field. That might sound like overkill, but it’s backed by masonry standards from the National Concrete Masonry Association (NCMA), which I always reference for my clients. Also, not all fasteners work. For curved structures, I recommend using screw-in fasteners with winged washers, instead of staples. Staples puncture the mesh wires, weakening them at the point of insertion, and they can pull out when the mesh springs back. Screw-in fasteners bite into the sheathing and secure the mesh without damaging the wires, which is critical for distributing load evenly across the curve. I once had a client in Seattle skip this step to save a few dollars on fasteners, and six months after the project wrapped, brick cracks started appearing along the curve’s high-tension points. We had to re-secure all the mesh with screws, costing them three times the initial fastener savings. That’s a mistake no one wants to make.
Third, mesh overlap and cut lines. On flat walls, you can overlap mesh by 6 inches, and cut straight lines with tin snips. On curves, that overlap has to be adjusted, and cuts have to be made along curved lines to maintain tension. Let me explain: when you lay mesh along a curve, the outer edge of the curve has a larger circumference than the inner edge. If you cut mesh straight to fit, you’ll end up with excess mesh on the outer edge that creates bumps, or too little mesh on the inner edge that leaves gaps. For curves, I teach my clients to calculate the arc length of each mesh panel by measuring the curve’s radius at that specific section, then cut the mesh along a curved line that matches that arc length. The overlap should be 4 inches instead of the standard 6 inches, and the overlapping section has to be fastened in two places along the curve—one on each mesh panel—to create a tight, seamless fit. I also always recommend using our custom laser-cut curved mesh for compound curves, where multiple curves meet at different radii. Laser cutting ensures that each panel is cut exactly to the arc length needed, so there’s no guesswork. On a recent domed ceiling project for a university library, the architect had 12 different curve radii across the dome’s surface. The mason was able to install the mesh in half the time because we supplied pre-cut panels matched to each arc, with overlapping sections pre-marked for fasteners. No more measuring and cutting on-site, which reduces errors and saves time.
Fourth, corrosion resistance. This is a requirement for all brick mesh, but it’s even more critical on curved structures, especially those in coastal or high-humidity areas. Curved structures often have hidden pockets where moisture can get trapped, especially at the inner edge of the curve, where water can’t drain easily. Standard galvanized mesh has a zinc coating that protects against corrosion, but that coating wears thin at sharp bends, which are common in curved mesh installation. For curved structures, I always recommend using either hot-dip galvanized mesh with a thicker zinc coating (2.5 ounces per square foot, compared to the standard 1.5 ounces) or 316 stainless steel mesh, which is more resistant to salt and moisture. On that Florida coastal resort job I mentioned earlier, the GC initially tried to use standard galvanized mesh because it was cheaper. But we noticed the curve had a 1-inch lip where water could pool, so we advised switching to hot-dip galvanized mesh. A year after installation, we did a follow-up inspection, and there was no sign of corrosion, whereas a nearby project using standard mesh had developed rust spots at the curve’s inner edge. Corrosion in mesh leads to expansion, which pushes bricks out of alignment and causes structural damage over time—something no one wants to deal with, especially on a curved structure that’s a focal point of the design.
Now, let’s talk about common mistakes I see on curved structure installs, because even if you follow all the requirements, small missteps can cause big problems. The first mistake is not doing a mock-up section on-site. I always tell clients to build a 10-foot section of the curve first, test the mesh fit, adjust fastener spacing, and make any tweaks before installing the rest. On a job I supplied for a hospital in Houston, the architect specified a compound curve for the entrance facade. The GC skipped the mock-up, and after installing 50 feet of mesh, they realized their fastener spacing was too wide, leading to mesh spring-back. They had to rip out all the mesh and start over, costing them $15,000 in labor and materials. The mock-up takes a day at most, and it saves you thousands in the long run. Another common mistake is not accounting for thermal expansion. Curved structures are exposed to temperature changes, which cause the structure to expand and contract. Flat mesh can accommodate small movements, but curved mesh needs to have small slits every 2 feet along the inner edge to allow for movement without cracking. I learned that from a job in Phoenix, where a curved retaining wall had developed ½-inch wide cracks after a year of extreme temperature swings. We added the slits to the mesh, and no further cracks have appeared in the five years since.
As a brick mesh supplier, I don’t just sell products—I provide consulting support for curved structure projects, because I know how easy it is to make these mistakes. Last year, I worked with a small architecture firm in Portland that was building a curved wine bar facade. They had a tight budget and were trying to source mesh locally, but when I reviewed their plans, I noticed they were using standard rigid mesh. I helped them adjust their fastener spacing, recommended a flexible mesh that fit their budget, and even sent a mason to the site for a day to walk their team through the installation. The project came in on time and on budget, and they’ve referred three other clients to me since. That’s the kind of relationship I value more than any sale—helping people do the job right the first time.
If you’re working on a curved structure—whether it’s a small residential entry or a large commercial facade or dome—don’t cut corners on your brick mesh installation. The special requirements for curves aren’t arbitrary; they’re based on decades of experience with masonry failure, material science, and structural engineering. The right mesh for the job will save you time, money, and headaches in the long run, and it will ensure your curved structure looks beautiful and holds up for decades.
If you’re ready to source brick mesh for your curved project, or you have questions about installation requirements, I’d be happy to walk through your plans with you and recommend the right products and processes. Contact our team to discuss your specific needs, and let’s make your curved structure project a success.
Dutch Weave Mesh References
- National Concrete Masonry Association. (2020). Masonry Design and Construction for Curved Structures. NCMA Technical Note 20-05.
- American Society for Testing and Materials. (2018). Standard Specification for Steel Wire, Galvanized-Coated, for Concrete Reinforcement. ASTM A1064/A1064M-18.
- International Code Council. (2021). International Building Code: Masonry and Wall Requirements. ICC 2021, Chapter 21.
Hengshui Anbang Road and Bridge Material Co., Ltd.
As one of the most professional brick meshmanufacturers and suppliers in China, we’re featured by quality products and good service. Please rest assured to wholesale bulk customized brick mesh from our factory. For pricelist, contact us now.
Address: Zhaobazhuang Wire Mesh Industrial Park, Shenzhou City, Hengshui City, Hebei Province
E-mail: 857732879@qq.com
WebSite: https://www.cnanbang.com/
